Instructions for The Premium Suul Experience Workshop
Total duration: Approx. 8-10 days
Read in full before starting and check off each step as you complete it. Ensure that your sanitized equipment has cooled. Have something to keep time, and good company or music to pass it well.
Sanitize all equipment (except the plastic bottles) with boiling water (do NOT use soap on clay pottery). Thoroughly clean your hands with warm water and dry with paper towels.
Step 1. Presoak Sunuruk (5 min, incl. the time to clean the brew vessel)
When Sunuruk comes in contact with water, it will immediately start to activate and populate the water with its natural enzyme and yeast. Softening the dry Sunuruk will allow the active ingredients to mix quickly and effectively with the cooked rice at a later stage.

Clean the brew vessel with hot water 3-4 times. Do NOT use soap. Wipe dry with paper towel.

Pour Sunuruk into the clean brew vessel.

Add 1L of filtered water at room temperature.

Cover with the cotton cloth and rubber band.
Step 2. Wash and Drain the Rice (50 min)
Washing rice is a very important step in the Suul building process. Read more about it in the essays section of this website. Depending on the quality of the rice and the time of its milling, the rice will require different washing techniques. The method listed below is the most common. As a rule of thumb, you can stop washing once the water runs clear.

Pour sweet rice into the clean steam pot base.

Mix the rice kernels with your hand under running water at room temperature, filling and emptying the water repeatedly until the water becomes transparent (5+ repeats, about 10 min).

Let the water run onto one side of the pot, carefully raising the side to pour out the cloudy water from the other side.

Fill the pot a final time with filtered water and let the rice soak (30 min).

After 30 min. carefully pour the soaked rice into the colander.

Drain the soaked rice in the colander (10 min).
Step 3. Cook Rice (45 min)
The Suul in this recipe uses sweet rice, which absorbs water quickly and cooks faster than the regular rice. It produces a delicious, well-rounded taste. Please note that different types of rice require different cooking methods; when cooking rice to form Suul, steaming it is the most efficient and consistent method. It needs to be completely cooked through, and somewhat dry on the surface. This way, it will absorb the nuruk/water mixture more evenly.

Pour 1L of water into the now empty steaming pot, and bring to a boil.

Once the water is boiling, wet the 1st rice mesh and carefully place over the steamer insert. Be very careful around the hot steam.

Pick up the colander holding the drained soaked rice, and tap the bottom with your hand a couple of times to release the trapped water between the rice kernels. Carefully pour it onto the wet rice mesh.

Pull the mesh out to spread it evenly under the rice and fold the corners of the mesh over the rice. Use the ends of your fingers to distribute the rice evenly inside the steamer.

Close the lid and keep on high heat (30 min). After 30 minutes, turn the heat off but leave the lid on for an additional 10 min. to finish cooking the rice using the residual heat inside the steamer.
Step 4. Cool Rice (25 min)
The kit includes 2 rice meshes: one to cook the rice in, and the other to cool the rice on. We have included in this manual a minimal but effective cooling system. This conscious decision was made to help you cool the cooked the rice as similarly as possible to experienced Suul masters, because without properly prepared rice, one cannot produce proper Suul.

Raise the cooling rack by placing 1 paper cup under each corner.

Wet the 2nd rice mesh and spread it over the rack.

Open the lid of the steamer pot and let the hot air escape. Transfer the cooked rice from the steamer by lifting the four corners of the 1st mesh and carrying it to the 2nd mesh on the rack.

Carefully turn the 1st mesh upside down and pour the cooked rice onto the center of the 2nd mesh on the cooling rack.

Using the rice spoon, spread the hot cooked rice gently and evenly across the cooling mesh. If you hold the rice spoon perpendicular to the cooling rack, you can minimize breakage of the rice kernels.

Let the cooked rice cool completely (about 20 min; it should feel cooler than the back of your hand).
Step 5. Build Your Suul (10 min)
When the rice is cooled, you are ready to build Suul. Make sure your hands are clean and rid of any lotion, jewelry, or accessories. If you are wearing nail polish, wear food safe gloves. By now, the Sunuruk and water mixture will be actively awaiting the rice. You will almost hear cheers echoing from the brew vessel.

Spoon the cooled rice into the brew vessel.

Add an additional 1L of water to the vessel (+0.5L for drier taste, -0.5L for sweeter taste).

Gently mix the contents with a clean hand, loosening rice clusters and lifting Sunuruk from the bottom to combine everything evenly.

Resecure the cotton cloth and rubber band.

Place the clay cover on top. Keep it in a cool place away from direct sunlight, animals and children.
Step 6. Brew Your Suul (8-10 days)
During the hotter months your Suul will ferment quickly, but in the colder months it will take a little longer. Enjoy your first journey with your family’s Suul. Each day, you should check the condition of the Suul and witness how it changes. Keep a daily journal of your Suul, noting any transformations of form, smell and taste (it is safe to taste your Suul after 7 days - use a small, clean metal spoon to sample).

Your Suul will need to brew for 8-10 days, depending on the condition of the nuruk and the temperature of the room where the brew pot is located.

Once a day, open the lid and remove the rubber band and cotton cloth. Use a clean spatula to stir the contents gently, scraping any settled bits from the inside wall of the vessel. Your brew is a living organism: Talk to it, wish it well.


After stirring and/or tasting, resecure the cotton cloth and rubber band, and place the lid back on. In colder climates or living spaces, you may wish to brew your Suul for an additional 3-4 days before straining.
Step 7. Strain and Bottle Your Suul (30 min - 1 hour, longer if you are tasting)
When your Suul tastes good to your palette, it is ready to be strained and bottled. Sanitize the funnel, ladle, stainless pot, and straining bag, drying off any excess water. Rinse the plastic bottles with warm (NOT hot) water.
You are about to start unveiling the taste of your family’s Suul. This is a seriously unique micro-brew! Because every household and body is home to a unique set of microbiological organisms, it is certain that these 3 liters of Suul will taste like no other in the world! You might like to prepare some Chan, 찬(accompanying foods for suul) before you pull your family’s first Suul. Please see the Chan section of this website for more.

Place the straining bag inside the pot and fold the edge over the rim.
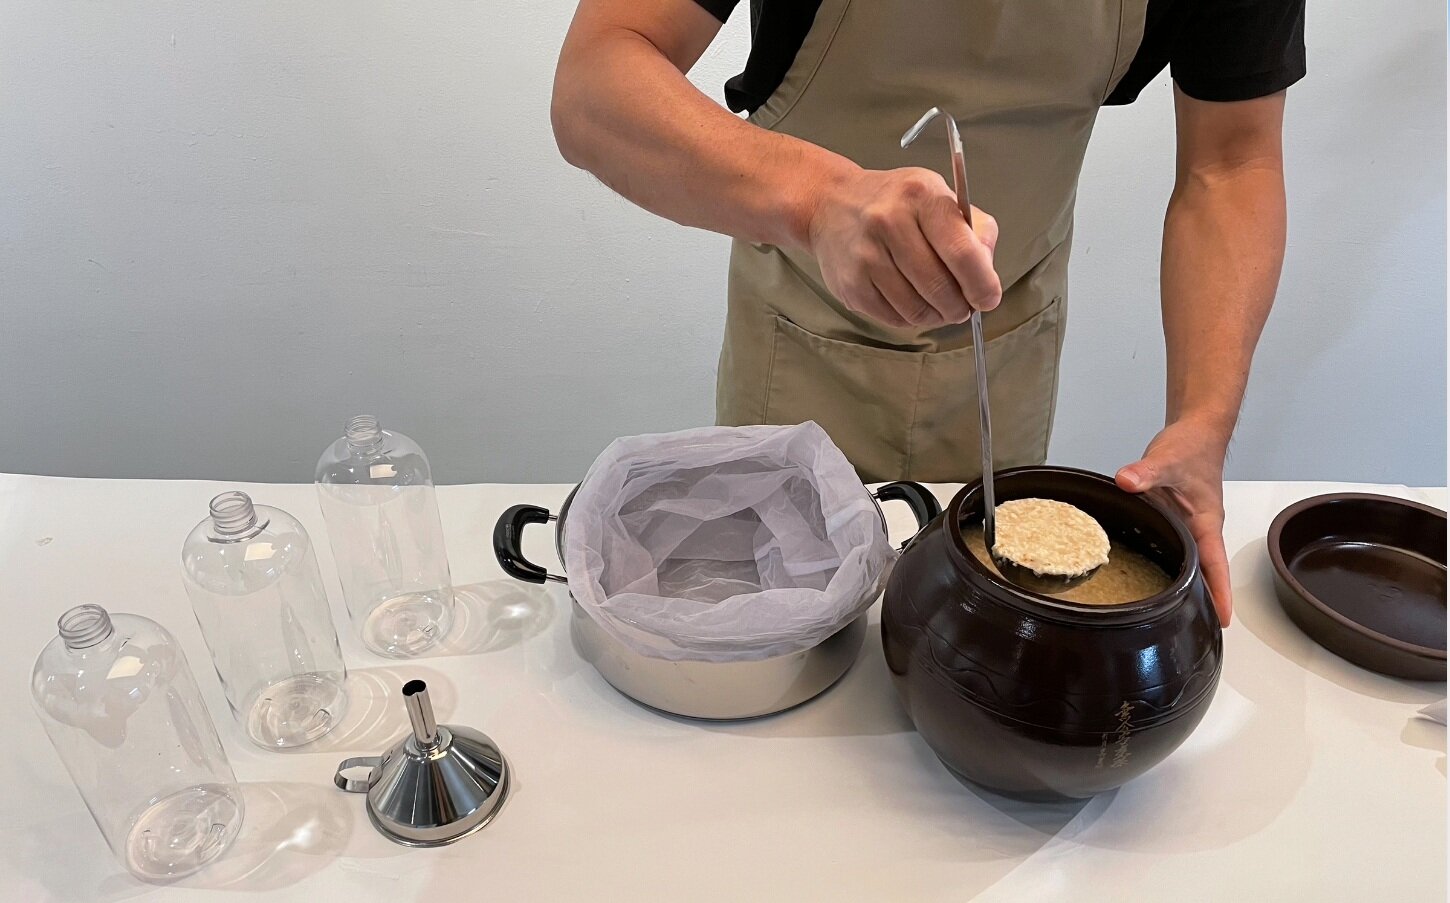
Ladle the brewed Suul into the straining bag. Stir the contents of the brew vessel between each scoop. When you reach the bottom of the pot, carefully pick up the vessel to pour out the remaining Suul.
Ladle the brewed Suul into the straining bag. Stir the contents of the brew vessel between each scoop.

When you reach the bottom of the pot, carefully pick up the vessel to pour out the remaining Suul.

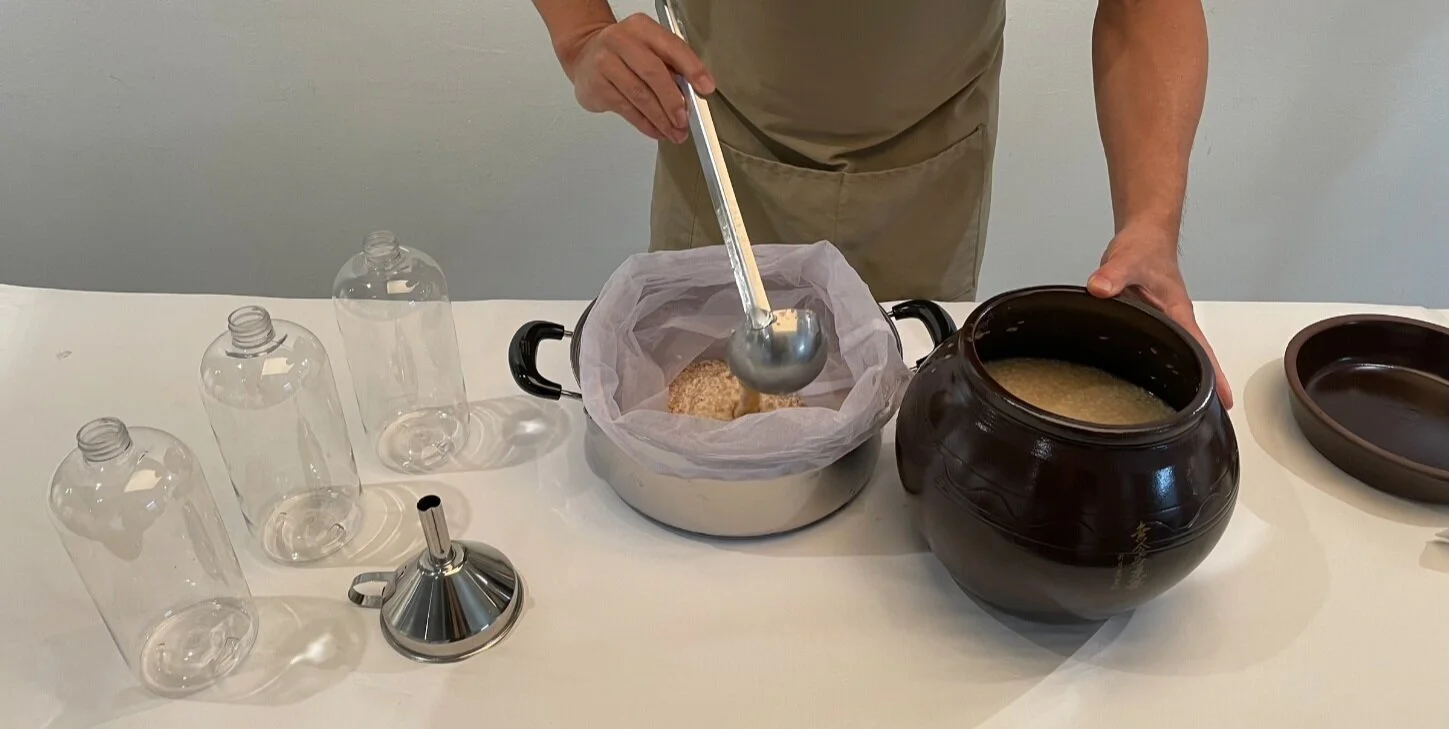
Gather the top of the straining bag and tie the mouth using the string. Twist the top of the bag around your fingers and hold it closed tightly. Squeeze gently with your other hand and let the Suul drip into the pot.

Continue squeezing the strainer bag, gently but firmly, until most of the liquid has dripped out.

Place the bag with lees in the brew vessel for now (discard lees and clean equipment later), and rinse ladle.

Place the funnel into the mouth of one bottle and use the clean ladle to carefully transfer the Suul into the funnel opening.

Between each scoop, stir the Suul gently with the ladle to prevent settling.

Leave about 100ml of room in the bottle, and repeat with remaining bottles. This kit produces a little over 3 liters of Suul*.
Congratulations! This is your family’s first Suul. May the culture descend down your family line for thousands of years.
*Your Suul should be around 15% ABV, and will keep for up to 1 year refrigerated at 3-6°C. When opening your stored Suul, use caution to let the gas out slowly and prevent spillage. You may need to close and partially open the cap multiple times until the pressure decreases.